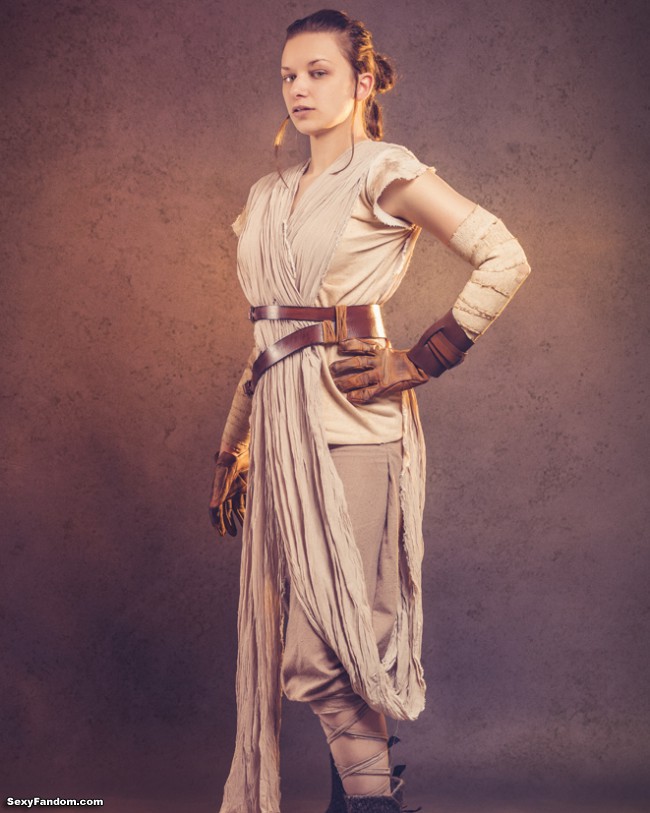
Star Wars cosplayer Mowseler makes her own outfits—and is incredibly good at it! Here she appears as Rey from Episode VII with a costume made from dyed cotton jersey, dyed raw silk, and medical gauze, among other materials. All that work she put into getting the colors exactly right paid off, creating an unforgettably accurate Rey. The two strands of hair framing her face have exactly the right amount of curl, and even the facial expression is spot-on. David Love Photography really brings the colors of Jakku to life with a sandy background that makes her costume pop. I have to conclude that Mowseler isn’t playing Rey; she is Rey. Take a look at the photos and see for yourself!
Build log:
Tunic: Hemp/cotton jersey from dharmatrading.com; dyed with ECRU fiber reactive dye (although if I remake it, I will choose a more grey color – I spent WEEKS agonizing over what color her costume was). I used cotton gauze for the sleeves (I originally got this for the arm wraps, but changed my mind. Luckily, I had dyed both together so they were the same color) and went over the whole thing with sandpaper and dry brushed brown paint
Pants: Raw Silk from Dharma; dyed with SAND DUNE acid dye (I ordered a different kind of silk to try as this one feels too nubby, but looks decent in pictures and is pretty comfortable otherwise)
Legwraps: Leftover Raw Silk – I hit the edges with fray glue which gave them a rugged appearance, but also made them insanely uncomfortable. After seeing the movie now, it doesn’t even look like she used them!
Boots: From Pozu
Arm Wraps: Medical gauze; soaked for several hours in coffee/grinds; dry brushed with brown paint and the edges were seared with a soldering iron
Tabard Wrap: Viscose Silk/Rayon Blend from Dharma; dyed with SAND DUNE acid dye – twisted it into knots and left to air dry to create the wrinkles – I will probably iron out the bottoms a little so they aren’t so tightly wrinkled later
Belts: Raw leather blanks from Tandy; dyed with OLD LEATHER shoe dye from shoecaresupplies.com (MY FAVORITE WEBSITE EVER BTW), touched up the edges with BLACK shoe dye, then went over the whole thing with the preparer to give it a worn look. Stretched and bent it several times to cause creases. Used the buckles from my Signal Satchel bag (not featured). Used twine for the details on the side. They were two separate pieces, so I used contact cement on the edges, then a piece of faux leather as backing to keep them together where they meet
Gloves: Pretzl gloves; removed the Pretzl wrap and dyed them with LEATHER, OLD LEATHER, and dry brushed BLACK shoe dye. Used preparer generously to create weather looked
Bracer: Two pieces of faux leather with black craft foam sandwiched inside (gave it a very nice seamed look). Contact cemented the leather sides to the craft foam and trimmed the edges. Cut the slots in and it was basically done. Painted the backside with LEATHER shoe dye to give the accent color