
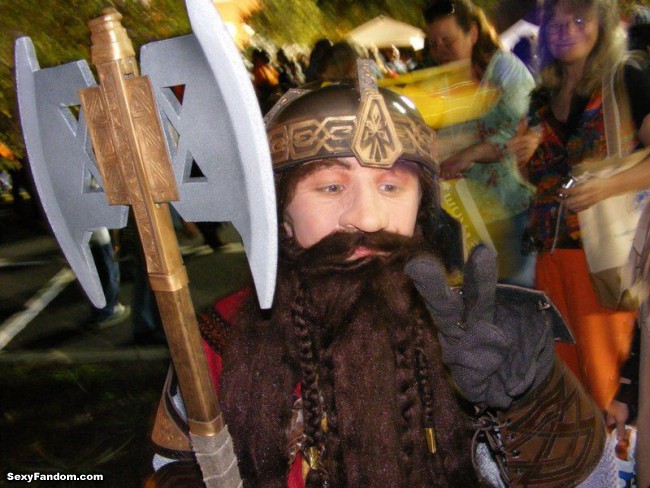
One of the most memorable characters from Lord of the Rings, Gimli has both a highly distinctive appearance and personality. Here, RavingChild brandishes a battle axe with an all-too-familiar self assurance that we see in the movie’s Gimli. Shame that the hair isn’t more red (since that’s part of Gimli’s appeal), but his general spirit lives on through this fun portrayal. This cosplay is a classic example of pulling off a specific, believable effect with very little on hand. Some of the costuming highlights here are the gold design around the rim of the helmet as well as the axe handle–the blade itself looks a bit cheap, but at least that way we know Gimli can’t lop our heads off with it.

The first step in making the helmet was to cut off the bill and the ear cups of an old batting helmet in order to reduce the profile a bit. As the helmet was a tight fit for my son, I removed all of the foam padding from the interior as well. I used the patterns and some eyeball measurements to make a cardboard mockup of the helmet, just to figure out how the pieces would need to be scaled. Once I had the scaling information, I scaled the patterns and printed them at the final size. I also cut-and-pasted pieces of the cheekguard patterns together in order to make a pattern for the headband decorations.
To make the final pieces, I cut the base shapes out of craft foam, and used spray adhesive to mount the foam shapes to pieces of stiff craft felt, just to provide a more rigid backing. I then cut out the shapes from the felt, leaving extra felt tabs at the locations where pieces would need to be attached to each other. See the photos for details. The base pieces were sandwiched between two layers of parchment paper and briefly ironed at a medium heat setting to heat-seal the surface of the foam and make it look less foamish.
I then used the patterns to mark out the ornamental details onto more craft foam. For some pieces, I transferred the designs to the foam using light-colored carbon paper (available at any well-stocked sewing/fabric shop), and for others I just taped the paper pattern directly to the foam. Either method will work.
For the more intricately detailed pieces, I spray-mounted the foam to a piece of construction paper before cutting, to reduce the amount of stretching while cutting out the details. This seemed to help a lot.The detail pieces were then cut out from the foam sheets using a very sharp hobby knife. Fine lines in the design were simply scored partially through the foam. This part took a very long time, and I think I have carpal tunnel now. Also, I can’t seem to focus my eyes anymore.
The base pieces were pre-colored using a black fabric marker that I smudged a bit with my finger. The idea was to darken the background and make the color less uniform, to simulate the tarnished-metal look I was going for, and to add a bit of visual interest.
The detail pieces were then glued to the base pieces with tacky glue (foam glue would also work). When the glue was dry, the assembled pieces were ironed as above, and then the raised details were colored with Rub & Buff, using my favorite painting tool.